Monday, April 16, 2012

Changing Passwords in Siebel 7.8.2

Changing Passwords in Siebel 7.8.2


Changing Password for Siebel Service Owner Account (WINDOWS)

To change the password for the Siebel service owner account

1 Change the Windows domain login password for the Siebel service owner account, which is the

user that starts the Siebel Server system service.

2 Change the password for the Siebel Server system service.

a Choose Start > Programs > Administrative Tools > Services.

b Right-click on the Siebel Server System Service, and select Properties.

c In the Properties dialog box for this service, click the Log On tab.

d Enter the password in the Password and Confirm Password fields, and click OK.

NOTE: The password specified here must correspond to the Windows domain login password you

modified in Step 1.

3 Stop and restart the Siebel Server system service.


To change the password for the Siebel administrator database account

1 End all client sessions and shut down the Siebel Server. Use the following command to shut down

the server:

SIEBSRVR_ROOT/bin/stop_server all

NOTE: In order to stop all Siebel Servers in the Siebel Enterprise, you must run this command

on all Siebel Server machines.

2 Use Server Manager to change the password in the Siebel Gateway Name Server.

a Log in at the Enterprise level.

srvrmgr -g SiebelGatewayName -e EnterpriseServerName -u UserName -p Password

b At the Server Manager prompt, enter the following command:

change enterprise param Password=NewPassword

3 Change the password in the database.

For more information, refer to your RDBMS documentation on changing passwords.

4 Stop and restart the Siebel Gateway Name Server.

$SIEBEL_ROOT/SiebelGatewayName/bin/stop_ns

$SIEBEL_ROOT/SiebelGatewayName/bin/start_ns

5 Restart all Siebel Servers. Perform this step for each applicable Siebel Server.

$SIEBEL_ROOT/ServerName/bin/start_server all

6 Connect to the Server Manager and verify the password change:

srvrmgr -g SiebelGatewayName -e EnterpriseServerName -s SiebelServerName -u SADMIN

-p NewPassword

You should be able to log in as SADMIN with the new password.

Wednesday, April 4, 2012

gzip: stdin: unexpected end of file tar: Unexpected EOF in archive tar: Unexpected EOF in archive tar: Error is not recoverable: exiting now

gzip: stdin: unexpected end of file tar: Unexpected EOF in archive tar: Unexpected EOF in archive tar: Error is not recoverable: exiting now


While uncompressing the following file, I received below errors.

$ tar -xzf OVM_EL5U3_X86_ORACLE10G_SIEBEL8006ENU_SIA_PVM.tgz.1of2


gzip: stdin: unexpected end of file

tar: Unexpected EOF in archive

tar: Unexpected EOF in archive

tar: Error is not recoverable: exiting now


Solution:

I fixed the issue with uncompressing both the files altogether, doing them separately was causing the error.


[root@vmserver seed_pool]# cat OVM_EL5U3_X86_ORACLE10G_SIEBEL8006ENU_SIA_PVM.tgz.1of2 OVM_EL5U3_X86_ORACLE10G_SIEBEL8006ENU_SIA_PVM.tgz.2of2 | tar -xzvf -

OVM_EL5U3_X86_ORACLE10G_SIEBEL8006ENU_SIA_PVM/

OVM_EL5U3_X86_ORACLE10G_SIEBEL8006ENU_SIA_PVM/System.img

OVM_EL5U3_X86_ORACLE10G_SIEBEL8006ENU_SIA_PVM/vm.cfg

OVM_EL5U3_X86_ORACLE10G_SIEBEL8006ENU_SIA_PVM/oracle10g_x86_asm.img

Thursday, March 29, 2012

How to permanently disable an Account through ldif in Oracle Internet Directory:


How to permanently disable an Account through ldif in Oracle Internet Directory:

Step:1

Note: make sure the object class oracleUserV2 is already added to users.

Create disable.ldif

*************************************

dn: cn=qasim1,cn=users,dc=hostname,dc=com

changetype: modify

replace: orclisenabled

orclisenabled: DISABLED

************************************

If orclUserV2 is not already there, then the disable.ldif would be like:

***********************************

dn: cn=qasim1,cn=users,dc=hostname,dc=com

changetype: modify

objectclass: orclUserV2

orclisenabled: DISABLED

***********************************

Step:2

execute following command at shell:


ldapmodify -h hostname -p 389 –D cn=orcladmin -w oracle -c -f disable.ldif


Note: You can add as many users as you want in the same format in disable.ldif

How to enable an Account through ldif in Oracle Internet Directory:

Step: 1


Create enable.ldif


*****enable.ldif*************

dn: cn=qasim1,cn=users,dc=hostname,dc=com

changetype: modify

replace: orclisenabled

orclisenabled: ENABLED

*****************************


Step: 2


execute following command at shell:


ldapmodify -h hostname -p 389 –D cn=orcladmin -w oracle -c -f enable.ldif


--> It will change the status of user from Disabled to Enabled.

--> You can add multiple users in enable.ldif like:


dn: cn=qasim1,cn=users,dc=hostname,dc=com

changetype: modify

replace: orclisenabled

orclisenabled: ENABLED


dn: cn=qasim2,cn=users,dc=hostname,dc=com

changetype: modify

replace: orclisenabled

orclisenabled: ENABLED


dn: cn=qasim3,cn=users,dc=hostname,dc=com

changetype: modify

replace: orclisenabled

orclisenabled: ENABLED


--> If you want to hide password in ldapmodify command for security reazons, you can simply add -q, like:


ldapmodify -h hostname -p 389 -D cn=orcladmin -q -c -f enable.ldif


It will ask password for orcladmin and will execute enable.ldif

Monday, March 19, 2012

Upgrading Oracle Access Manager from 10.1.4.1 to 10.1.4.3. (Step 2)
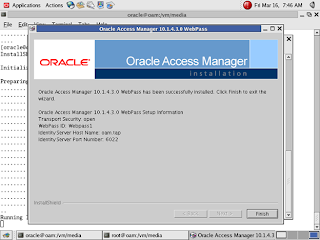
Upgrading Oracle Access Manager from 10.1.4.1 to 10.1.4.3. (Step 2)


1   <Upgrading Oracle Access Manager from 10.1.4.1 to 10.1.4.2>


•             Confirm that the following component are already at release 10g (10.1.4.2.0). For example:

                IdentityServer

                WebPass

                PolicyManager

                AccessServer

•             Stop the Oracle Access Manager component instance you are patching, for example, the Identity Server.

•             Back up your Oracle Access Manager component installation directory.

•             Move the backup directory to another location and record this so you can locate it later, if needed.

•             Change to the temporary component-specific directory you created, and run the patchinst program for your platform, for example:  All Unix Operating Systems: ./patchinst

•             Then prompted, type the name of the directory where you want to apply the new patch set. You must apply the new release in the same location as the component you are upgrading, for example:     installdir\identity or installdir\access.

•             Restart the component that you patched.

•             Repeat the steps above to patch any additional instance of the same component.

•             Repeat the steps above to patch any other Oracle Access Manager component instance.


2   <Upgrading Oracle Access Manager from 10.1.4.2 to 10.1.4.3>


•             Confirm that the following component are already at release 10g (10.1.4.2.0). For example:

                IdentityServer

                WebPass

                PolicyManager

                AccessServer


•             Stop the Oracle Access Manager component instance you are patching, for example, the Identity Server.

•             Back up your Oracle Access Manager component installation directory.

•             Move the backup directory to another location and record this so you can locate it later, if needed.

•             Change to the temporary component-specific directory you created, and run the patchinst program for your platform, for example: All Unix Operating Systems: ./patchinst

•             When prompted, type the name of the directory where you want to apply the new patch set. You must apply the new release in the same location as the component you are upgrading, for example:     installdir\identity or installdir\access.

•             Restart the component that you patched.

•             Repeat the steps above to patch any additional instance of the same component.

•             Repeat the steps above to patch any other Oracle Access Manager component instance.

Upgrading Oracle Access Manager from 10.1.4.1 to 10.1.4.3. (Step 1)

Upgrading Oracle Access Manager from 10.1.4.1 to 10.1.4.3. (Step 1)


You can not upgrade 10.1.4.1 to 10.1.4.3 directly, you need to upgrade it from 10.1.4.1 to 10.1.4.2 and then 10.1.4.2 will be upgraded to 10.1.4.3.

Upgrade will be in two phases.

  • 10.1.4.1 to 10.1.4.2 <Apply patch 5957301>
  • 10.1.4.2 to 10.1.4.3 <Apply patch 8276055>

How to Unlock an Account expired by Password Policy in Oracle Internet Directory


How to Unlock an Account expired by Password Policy in Oracle Internet Directory


  • I created an account in Oracle Internet Directory as qasim.
  • Implemented a password policy on this user that it should expire after 200 seconds.
After 200 seconds I tried to login with this user but got an error as below:

ldap_bind: DSA is unwilling to perform
ldap_bind: additional info: Account Policy Error :9050: GSL_ACCTDISABLED_EXCP :Your Account has been disabled. Please contact the administrator.
  • This account can by unlocked through OIDDAS which is not present in my environment, so I had to use Directory Manager or command line tool. In the directory manager the option to unlock this account was disabled, so the only way was to use the command line tool.
  • I created an ldif file as below
************unlock.ldif*****************


dn: cn=qasim,cn=users,dc=tap,dc=com

changetype: modify

add: orclpwdaccountunlock

orclpwdaccountunlock: 1

*************************************

  • Executed below command and it successfully unlocked the account:
ldapmodify -h ldap.tap -p 389 -D cn=orcladmin -q -v -f unlock.ldif

Note: It will ask you orcladmin password, after you enter password it would unlock your account and output would be as below:.

Please enter bind password:

add orclpwdaccountunlock:

1

modifying entry cn=qasim,cn=users,dc=tap,dc=com

modify complete

Sunday, March 18, 2012

Uninstalling Oracle WebPass


Restore the Web Server configuration file.

OAM : Create User Identity - You do not have sufficient rights


OAM : Create User Identity - You do not have sufficient rights


Solution:

You need to create a workflow in order to achieve this. Open Identity Console


Click on User Manager

After the User Manager click on Configuration:


In the Configuration click on Workflow Defination:


Select the options which best suits you.


Create a User now.


Verify in OID, it would be creatd here.