Wednesday, October 12, 2011

Grid Control Agent does not start automatically on System Reboot

1. Open the agentstup file from the Oracle home of the Management Agent:
$ORACLE_HOME/install/unix/scripts/agentstup

2. Edit the file to replace executingUser=$USER with executingUser=`id -un`. Then, save and exit the file.

3. Run the root.sh script from the Oracle home of the Management Agent:

$/root.sh

4. Restart the Management Agent by running the following command from the Oracle home of the Management Agent:

$/bin/emctl start agent

This is a one-time action to be taken. Step (1) to Step (3) will ensure that the Management Agent starts up automatically every time you restart the host in the future.

Thursday, September 29, 2011

How to find if a psu is applied or not on an Oracle database

Please make sure that ORACLE_HOME/OPatch is in your PATH, afterwards execute

opatch lsinventory -bugs_fixed | grep -i 'database psu'

Expected Output:

10248523   12419331  Fri Sep 16 21:09:53 PKST 2011  DATABASE PSU 11.2.0.2.1
11724916   12419331  Fri Sep 16 21:09:53 PKST 2011  DATABASE PSU 11.2.0.2.2 (INCLUDES CPUAPR2011)
12419331   12419331  Fri Sep 16 21:09:53 PKST 2011  DATABASE PSU 11.2.0.2.3 (INCLUDES CPUJUL2011)

After creating policy in Oracle Access Manager, will it directly effect on the application, or we need to restart the OAM?

The policies could learned by the OAM, but these will take some times. typical 4-8hours.
When you don't have time to wait then you may to restart the OAM.

Unable to recieve Grid Control Alerts in Email

Please make sure that you have setup the notifications as per the following documents:

Note 429426.1:Configuring Email Notification Method in EM - Steps and Troubleshooting
Note 429422.1: How To Configure Notification Rules in Enterprise Manager Grid Control?

If still the issue is there then proceed with the following


- Stop the OMS:

cd /opmn/bin
./opmnctl stopall


- Login to the Repository Database as the SYSMAN user and execute:

BEGIN
emd_maintenance.remove_em_dbms_jobs();
emd_maintenance.submit_em_dbms_jobs();
commit;
end;

- Check the schedule of the dbms_jobs using:

SELECT p.display_name
FROM (SELECT display_name, dbms_jobname
FROM mgmt_performance_names
WHERE is_dbmsjob = 'Y') p,
user_jobs j
WHERE UPPER(j.what) LIKE '%'||UPPER(p.dbms_jobname)||'%'
AND (
j.broken != 'N'
OR
j.failures > 0
OR
(j.next_date < SYSDATE-1/48 AND j.this_date IS NULL)
OR
(j.next_date < SYSDATE-1/6 AND j.this_date IS NOT NULL)
);

This query should NOT return any rows.

- Re-start the OMS:

cd /opmn/bin
./opmnctl startall

- Wait for sometime and check whether you are receiving the email notifications.

OPatch cannot find a valid oraInst.loc file to locate Central Inventory. OPatch failed with error code 104

OPatch cannot find a valid oraInst.loc file to locate Central Inventory. OPatch failed with error code 104

$ opatch lsinventory
Invoking OPatch 11.1.0.8.1

Oracle Interim Patch Installer version 11.1.0.8.1
Copyright (c) 2010, Oracle Corporation. All rights reserved.


Oracle Home : /ora/app/product/11.1.0/db_1
Central Inventory : n/a
from :
OPatch version : 11.1.0.8.1
OUI version : 11.1.0.7.0
OUI location : /ora/app/product/11.1.0/db_1/oui
Log file location : n/a

Patch history file: /ora/app/product/11.1.0/db_1/cfgtoollogs/opatch/opatch_history.txt

OPatch cannot find a valid oraInst.loc file to locate Central Inventory.

OPatch failed with error code 104


Work around
--------------

OPTION 1:
a) Use the -invPtrLoc /etc/oraInst.loc
% opatch lsinventory -invPtrLoc /etc/oraInst.loc


OPTION 2:
a) Copy the oraInst.loc file from the /etc to /var/opt/oracle directory
b) Then run the opatch lsinventory
% opatch lsinventory

Doc ID 437026.1 ERROR :"OPatch cannot find a valid oraInst.loc file to locate Central Inventory.OPatch failed with error code 104"

I tried this workaround but it didn't worked. I found that both oraInst.loc and oraInventory were not there so, I had to create a new
inventory which I did as following and afterwards I was able to apply the patch.

cd $ORACLE_HOME/oui/bin
% ./runInstaller -silent -ignoreSysPrereqs -attachHome ORACLE_HOME="" ORACLE_HOME_NAME=""


For Eg :
ORACLE_HOME=/u01/app/oracle/product/10.2.0.3
ORACLE_HOME_NAME=OraDb10g_home1

% ./runInstaller -silent -ignoreSysPrereqs -attachHome ORACLE_HOME="/u01/app/oracle/product/10.2.0.3" ORACLE_HOME_NAME="OraDb10g_home1"

ORA-01157: cannot identify/lock data file 10 - see DBWR trace file

SQL> startup
ORACLE instance started.

Total System Global Area 8551575552 bytes
Fixed Size                  2198344 bytes
Variable Size            1090520248 bytes
Database Buffers         7449083904 bytes
Redo Buffers                9773056 bytes
Database mounted.
ORA-01157: cannot identify/lock data file 10 - see DBWR trace file
ORA-01110: data file 10: '/oracle/data/data01/RAIDTEST/users02.dbf'


It could be that an OS process is locking the file and because of this oracle is throwing this error, in this case a System reboot would fix the issue.
Any how I followed the action plan as below:.

ls –al /oracle/data/data01/RAIDTEST/users02.dbf

/oracle/data/data01/RAIDTEST/users02.dbf not found

ls –ltr /oracle/data/data01/RAIDTEST/

$ ls -lrt /oracle/data/data01/RAIDTEST/
total 163308512
-rw-r-----   1 oracle     oinstall   9437192192 Aug 19 16:18 temp01.dbf
-rw-r-----   1 oracle     oinstall   20971528192 Aug 19 16:27 raid_TEST_t3_psys_01.dbf
-rw-r-----   1 oracle     oinstall   10485768192 Aug 19 16:28 raid_TEST_i3_psys_01.dbf
-rw-r-----   1 oracle     oinstall   10485768192 Sep 29 10:52 raid_TEST_l02.dbf
-rw-r-----   1 oracle     oinstall   6815752192 Sep 29 10:52 raid_TEST_i02.dbf
-rw-r-----   1 oracle     oinstall   314580992 Sep 29 10:52 raid_TEST_i01.dbf
-rw-r-----   1 oracle     oinstall   11534344192 Sep 29 10:52 raid_TEST_t02.dbf
-rw-r-----   1 oracle     oinstall   524296192 Sep 29 10:52 raid_TEST_t01.dbf
-rw-r-----   1 oracle     oinstall   209723392 Sep 29 10:52 users01.dbf
-rw-r-----   1 oracle     oinstall   20971528192 Sep 29 10:52 undotbs01.dbf
-rw-r-----   1 oracle     oinstall   545267712 Sep 29 10:52 sysaux01.dbf
-rw-r-----   1 oracle     oinstall   744497152 Sep 29 10:52 system01.dbf
-rw-r-----   1 oracle     oinstall   9748480 Sep 29 11:52 control01.ctl

select DISTINCT segment_name,segment_type from dba_extents where file_id = (select file_id from dba_data_files where FILE_name = '/oracle/data/data01/RAIDTEST/users02.dbf')

ERROR at line 1:
ORA-01219: database not open: queries allowed on fixed tables/views only

After looking at the above outputs, I found that the data file does not exist and there are no users in the file.
So I did following and it fixed the issue.

SQL>startup mount;

SQL>alter database datafile 10 OFFLINE DROP;

SQL>alter database open;

Monday, August 1, 2011

Installing Oracle Access Manager 10g on Windows Part 2

Installing Oracle Access Manager 10g on Windows Part 2

The following Installation is done on Microsoft Windows Server 2003


Installing Oracle Access Manager 10g on Windows Part 1


Installing Oracle Access Manager 10g on Windows Part 1

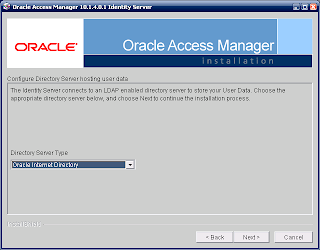
Access Manager 10g is not compatible for Windows XP,Vista or Windows 7. It can only be installed on Windoes Server edition. There is another very important prerequisite for this and that is Oracle Internet Directory. You have to install an image of Oracle Internet Directory on a separate machine which will be integrated with Access Manager later.
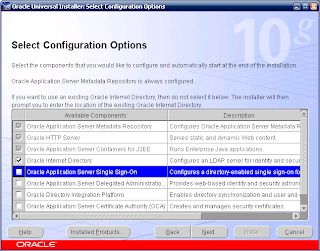
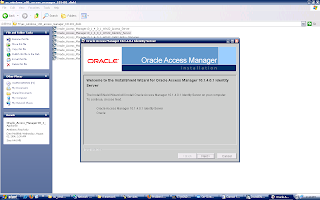
For this I have installed OID (Oracle Internet Directory 10.1.0.4) on windows XP machine. Please review the following sceen shots for that.


Monday, July 25, 2011

How to create user in OID with orcladmin privileges.


My environment details:

Hostname: oidoam.tap

OID Port: 389

Root user: orcladmin

Password: abc123

New user to be created: qasim

Step 1: First of all from the ORACLE_HOME/bin execute following command.

$ ldapsearch -h oidoam.tap -p 389 -D "cn=orcladmin" -w abc123 "uniquemember=cn=orcladmin,cn=Users,dc=tap,dc=com" "dn" > '/tmp/group.ldif'

This command will create an ourput file group.ldif in /tmp.

Sample group.ldif output:

cn=OracleContextAdmins,cn=Groups,cn=OracleContext,dc=tap,dc=com

cn=OracleUserSecurityAdmins,cn=Groups,cn=OracleContext,dc=tap,dc=com

cn=iASAdmins, cn=Groups,cn=OracleContext,dc=tap,dc=com

cn=UserProxyPrivilege, cn=Groups,cn=OracleContext,dc=tap,dc=com

cn=OracleDASAdminGroup, cn=Groups,cn=OracleContext,dc=tap,dc=com

cn=OracleSuperUserAdminGroup, cn=Groups, cn=OracleContext,dc=tap,dc=com

cn=ASPAdmins, cn=groups,cn=OracleContext,dc=tap,dc=com

cn=IAS & User Mgmt Application Admins, cn=Groups,cn=OracleContext,dc=tap,dc=com

cn=Trusted Applications Admins, cn=Groups,cn=OracleContext,dc=tap,dc=com


Step 2.

Edit the group.ldif file to following format:

dn: cn=OracleContextAdmins,cn=Groups,cn=OracleContext,dc=tap,dc=com

changetype: modify

add: uniquemember

uniquemember: cn=qasim,cn=Users,dc=tap,dc=com


dn: cn=OracleUserSecurityAdmins,cn=Groups,cn=OracleContext,dc=tap,dc=com

changetype: modify

add: uniquemember

uniquemember: cn=qasim,cn=Users,dc=tap,dc=com


dn: cn=iASAdmins, cn=Groups,cn=OracleContext,dc=tap,dc=com

changetype: modify

add: uniquemember

uniquemember: cn=qasim,cn=Users,dc=tap,dc=com


dn: cn=UserProxyPrivilege, cn=Groups,cn=OracleContext,dc=tap,dc=com

changetype: modify

add: uniquemember

uniquemember: cn=qasim,cn=Users,dc=tap,dc=com


dn: cn=OracleDASAdminGroup, cn=Groups,cn=OracleContext,dc=tap,dc=com

changetype: modify

add: uniquemember

uniquemember: cn=qasim,cn=Users,dc=tap,dc=com


dn: cn=OracleSuperUserAdminGroup, cn=Groups, cn=OracleContext,dc=tap,dc=com

changetype: modify

add: uniquemember

uniquemember: cn=qasim,cn=Users,dc=tap,dc=com


dn: cn=ASPAdmins, cn=groups,cn=OracleContext,dc=tap,dc=com

changetype: modify

add: uniquemember

uniquemember: cn=qasim,cn=Users,dc=tap,dc=com


dn: cn=IAS & User Mgmt Application Admins, cn=Groups,cn=OracleContext,dc=tap,dc=com

changetype: modify

add: uniquemember

uniquemember: cn=qasim,cn=Users,dc=tap,dc=com


dn: cn=Trusted Applications Admins, cn=Groups,cn=OracleContext,dc=tap,dc=com

changetype: modify

add: uniquemember

uniquemember: cn=qasim,cn=Users,dc=tap,dc=com


dn: cn=Common User Attributes, cn=Groups,cn=OracleContext,dc=tap,dc=com

changetype: modify

add: uniquemember

uniquemember: cn=qasim,cn=Users,dc=tap,dc=com


dn: cn=Common Group Attributes, cn=Groups,cn=OracleContext,dc=tap,dc=com

changetype: modify

add: uniquemember

uniquemember: cn=qasim,cn=Users,dc=tap,dc=com


Step 4:

Save the group.ldif file and execute the following command:

$ ldapmodify -h oidoam.tap -p 389 -D "cn=orcladmin" -w abc123 -f '/tmp/group.ldif'

To confirm if the user has been really created, kindly execute the below command:

$ ldapsearch -h oidoam.tap -p 389 -D "cn=orcladmin" -w abc123 "uniquemember=cn=qasim,cn=Users,dc=tap,dc=com" "dn"
Saturday, July 23, 2011

Step by Step Installation of Oracle Internet Directory 11.1.1.2.0 (Part 5)

Step by Step Installation of Oracle Internet Directory 11.1.1.2.0 (Part 5)


Step by Step Installation of Oracle Internet Directory 11.1.1.2.0 (Part 4)


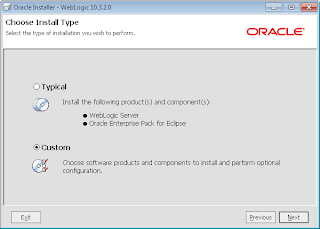
Part 4  Weblogic Server Installation (WLS Release 10.3.2 for Windows)


Step by Step Installation of Oracle Internet Directory 11.1.1.2.0 (Part 3)

Repository Creation Utility:


Oracle has introduced this utility in order to create the OFM related repositories. It is a
very useful tool. But you need to set the following parameters for your database. The utility can be downloaded from OFM download page.

Please get rest of the information from the screen shots.

SQL> alter system set aq_tm_processes=2 scope=both;

SQL> alter system set open_cursors=500 scope=both;

SQL> grant execute on DBMS_LOCK to PUBLIC;

SQL> grant execute on DBMS_JOB to PUBLIC;